
Contents
- What is content calendar scheduling, and why shouldn’t you do it by instinct?
- Preparation before scheduling: goals, channels, and audience persona
- How to divide topics and publishing dates in a content calendar so it’s easy to manage and track
- What minimum columns should a content calendar include?
- The process of scheduling content from ideas to a complete table
- Common mistakes that break a content calendar and how to avoid them
- How to keep a content calendar consistent without turning it into posting pressure
- Frequently asked questions about how to schedule content with a content calendar
If you usually post on impulse, your schedule will quickly drift: one week is packed, the next is silent, and the topics no longer support sales goals or audience nurturing. how to schedule content with a content calendar helps you look 2–4 weeks ahead and lock in topics, channels, and publishing dates before you start writing.
This section is suitable for content writers, shop owners, new marketers, and freelancers who need a simple enough work schedule to use right away for fanpages, websites, or social media. From there, you can plan by week or month, distribute content across channels, and avoid running out of ideas right before publishing.
What is content calendar scheduling, and why shouldn’t you do it by instinct?
How to schedule content with a content calendar means deciding topics, channels, formats, publishing times, and owners in advance so content stays aligned with its goals. For small shops, freelancers, or lean marketing teams, this approach helps avoid posting in bursts, leaving gaps, and losing the content flow.
How is a content calendar different from a content plan and a posting schedule?
A content plan is a list of ideas and topics; a content calendar is the implementation schedule by date, channel, and owner; while a posting schedule is only the part that locks in publishing times. For example, a cosmetics launch campaign might have 5 topics in the content plan, then be assigned in the content calendar to Facebook, TikTok, and the blog over 10 days, and only then have publishing times finalized for Tuesday morning and Thursday evening.
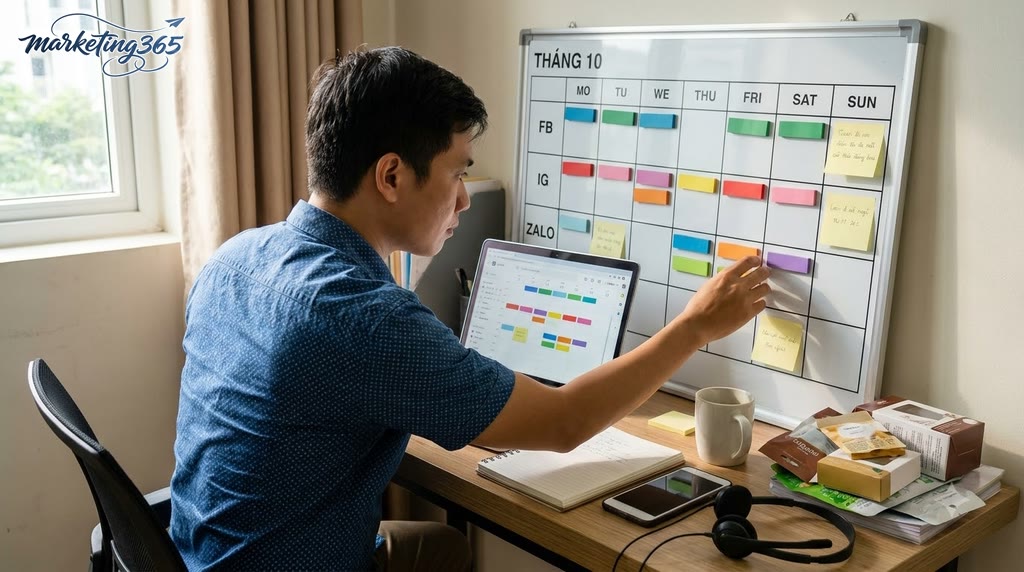
How to schedule content with a content calendar in 3 steps
- List the month’s goals and tasks. Clearly note whether the goal is awareness, lead generation, or sales. For a clothing shop, August might include 12 posts: 4 educational posts, 4 product posts, 2 feedback posts, and 2 promotional posts.
- Assign each piece of content to a specific channel and time. Use Google Sheets or Notion to create columns for publish date, channel, topic, format, and owner. For example, a product review post goes on Facebook on Monday, a short video goes on TikTok on Wednesday, and an SEO article goes on the blog on Friday.
- Review before finalizing the schedule. Check for duplicate topics, too many sales posts, or missing funnel-supporting content. If a week has 3 consecutive sales posts, switch some of them to FAQ or product comparison content.
When should you use a content calendar instead of posting on instinct?
You should use a content calendar when your content is scattered, your team keeps asking, “What are we posting this week?”, or you need to run multiple channels at once. It’s also essential when one person has to handle writing, design, and publishing.
For example, a freelancer managing 2 fanpages and 1 blog can easily miss deadlines without a tracking sheet. Missing just 2 posts in a week can break the campaign flow, and a promotional post may lose its impact at the right moment.
A content calendar is also useful when you need to follow monthly, quarterly, or sales milestone campaigns such as March 8, September 9, or November 11. In that case, planning ahead helps you know which post opens the topic, which nurtures demand, and which closes the conversion.
Preparation before scheduling: goals, channels, and audience persona
Preparation before scheduling means locking in 4 minimum inputs: goals, audience, channels, and posting rhythm. Miss one link in the chain, and how to schedule content with a content calendar can easily turn into an empty table filled just to cover the dates, then revised halfway through because the team can’t keep up.
Choose your content goal before finalizing the posting schedule
Your content goal determines the type of post, its length, and how you measure the schedule’s effectiveness. If the schedule is for awareness, prioritize explanatory posts, opinion pieces, and shareable content; if it’s for traffic, you need clearly focused topics, specific headlines, and links to landing pages; if it supports sales, you need a content sequence that follows the marketing funnel, from problem to solution.
A short schedule that tries to do too many things at once usually breaks quickly, especially for small shops or solo freelancers. The fastest way to decide is to answer 3 questions:
- What should this schedule change in the next 30 days?
- Should each week prioritize one goal or split them evenly?
- Which posts should create demand, and which should only nurture engagement?
If you can’t answer those yet, don’t rush into a weekly social media posting schedule. Narrow the scope first, because a content campaign with a clear goal is always easier to maintain than a calendar that just posts “for the sake of posting.”

Set channels and frequency based on real operational capacity
Each channel has its own rhythm, so how to schedule content with a content calendar must be separated by website, fanpage, TikTok, and email. Websites/blogs are best for foundational and SEO content; social channels suit short, steady content; email is ideal for nurturing or reminder content.
Don’t copy one schedule across every channel. A blog post can be broken into 3–5 social snippets, but you shouldn’t keep the same posting style and frequency. For small teams, it’s better to schedule fewer channels but keep them consistent than to open too many fronts and lose momentum after 2 weeks.
Quick final checklist:
- Choose 1–2 main channels first.
- Clearly note the frequency you can realistically sustain for 4 weeks.
- Assign each channel one core content format.
- Match writing, design, approval, and publishing resources.
If the team can only handle 2 posts per week, keep that schedule stable before expanding. A good schedule is one that can run long-term, not one that just looks full.
How to divide topics and publishing dates in a content calendar so it’s easy to manage and track
How to schedule content with a content calendar effectively means turning goals into a clear list of topics, publishing dates, and owners. The easiest way is to define content pillars first, then arrange the schedule by week or month to avoid overload, repeated ideas, and missed posting rhythms.
How to divide content pillars so the schedule doesn’t repeat ideas
Dividing content into 3–5 pillars makes it easy to see which goal each week is serving. How to schedule content with a content calendar is usually cleanest when topics are grouped into one of four directions: customer problems, product/service groups, the customer journey, or content format.
For example, for a cosmetics shop, an easy-to-manage schedule might include: skin knowledge, product reviews, usage guides, customer feedback, and engagement content. This helps the writer avoid three consecutive posts that only talk about promotions. If your industry has few topics, split by common customer questions instead of drilling too deeply into each feature.
A quick check is to look at the last 2 weeks: if the same idea appears repeatedly in different wording, it should be merged or moved to another pillar. A good content calendar template makes it immediately clear which post is building awareness and which is supporting conversion.
How to arrange publishing dates by week, month, or quarter while keeping a steady rhythm
A weekly schedule works well for small teams because it’s easy to adjust when urgent tasks come up; a monthly schedule is better for locking in topics and assignments; a quarterly schedule is for long campaigns or major launches. How to schedule content with a content calendar should start with a fixed rhythm, then add extra posts only if resources allow.
A simple framework is: educational content at the start of the week, engagement content in the middle, and conversion content at the end. If you only have 3 posts per week, keep this rhythm to build audience habits. If you’re planning 30 days of content for a fanpage, don’t pack one week too tightly and leave the next one empty.

Checklist before finalizing the schedule:
- Does each week have all 3 content groups?
- Are there any posts on the same topic scheduled too close together?
- Do the publishing dates overlap with busy internal periods?
- Does the schedule leave 1–2 empty slots for topic changes if needed?
For a weekly, monthly, or quarterly social media posting schedule, the key is to keep a steady rhythm rather than post as much as possible.
What minimum columns should a content calendar include?
A minimum content calendar needs 8 columns: publish date, channel, topic, format, goal, owner, status, and notes. For beginners, keep the table simple so it’s easy to use in Google Sheets; when the team is small or running multiple channels, add approval, deadline, and file link columns.
| Publish date | Channel | Topic | Format | Goal | Owner | Status | Notes |
|---|---|---|---|---|---|---|---|
| 05/09 | Product selection tips | Image post | Increase engagement | An | Draft | Post at 7 PM | |
| 07/09 | TikTok | How to use the product | Short video | Increase reach | Bình | Ready | Add a light CTA |
The required columns are publish date, channel, topic, format, and status. The other three can be added later if you need clearer task ownership or want to measure performance by content. When planning monthly social media content, keep it brief: topic in 3–7 words, status in 4 levels such as Draft/Review/Ready/Posted, and notes only for special reminders.
A minimal template for beginners
A content calendar template for individuals or shop owners only needs 5 columns: publish date, channel, topic, format, and status. This structure is enough to plan 30 days of fanpage content without making the table heavy.

For example:
- 03/09 | Facebook | Customer feedback | Image | Ready
- 04/09 | TikTok | Quick usage guide | Video | Draft
Keep it very short so it’s easy to update every week. If one row takes more than 1 minute to fill in, the table is too detailed. With how to schedule content with a content calendar, the goal is to see at a glance what gets posted when, not to turn it into a long document.
A more detailed version for small teams or multiple channels
When building a content calendar workflow for a small business, add columns for approver, deadline, file link, and coordination notes. This helps the editorial calendar run with fewer errors when multiple people touch the same post.
It’s best to split it into 2 column groups:
- Operations group: publish date, channel, topic, format, status
- Coordination group: owner, approver, deadline, file link, notes
If the team runs a website, blog, email, and social channels, add a “distribution channel” or “content repurposing” column. This keeps the content calendar template from getting messy when one topic is turned into multiple versions for Facebook and TikTok.
Read more: Writing Tips to Never Run Out of Ideas
The process of scheduling content from ideas to a complete table
The process of scheduling content from ideas to a complete table starts by gathering ideas, assigning priorities, and then turning each idea into a task with a clear publish date and channel. If done in the right order, how to schedule content with a content calendar reduces the feeling of “having lots of ideas but not knowing what to post first,” especially when you need to keep Facebook, the blog, email, and social channels running at the same time.
Step 1: Gather ideas and filter by relevance
The first step in how to schedule content with a content calendar is to create an idea backlog that is as broad as possible, then filter it by goal. Idea sources usually come from customer questions, traffic-driving keywords, sales campaigns, sales feedback, competitor content, and repeated inbox questions. For small businesses, a separate Google Sheets file for the idea backlog is enough for quick notes, then score each idea against 3 criteria: does it support this month’s goal, is it topically relevant, and does the team have enough resources to execute it?
The filtering should be very practical:
- Keep ideas that help drive traffic, generate leads, or support sales.
- Remove ideas that are too broad, not tied to a goal, or require more resources than you currently have.
- Prioritize ideas that can be reused in multiple formats, for example one topic that can be turned into a post, a blog article, and an email.
A good content idea is not only strong in substance but also timely enough to execute. If a topic doesn’t support the campaign, doesn’t fit the sales season, or lacks data to work from, leave it at the bottom of the backlog instead of pulling it into the posting schedule.
Step 2: Assign format, channel, and deadline to each idea
Once you’ve chosen the ideas, turn them into specific tasks: where to publish, what format to use, and when it needs to be done. This is the step that turns the content calendar workflow for a small business into a real working board instead of a scattered topic list. The same idea may fit a blog better than a short video, or email better than a social post.
A quick method is to assign 4 fields to each row: format, channel, rough deadline, and owner. For example, a long-form how-to topic should go to the blog first, then be condensed into a social post; a short announcement can go to email or social first to take advantage of its freshness. With multi-channel content scheduling, don’t spread everything evenly across every channel in a mechanical way. Choose channels based on reading behavior and the goal of each piece of content.

Final scheduling checklist:
- Check how much content on the same topic is already scheduled that week.
- Make sure there is enough time for writing, design, approval, and publishing.
- Set a rough publish date first, then arrange priority order.
- Leave one empty slot for adjustments if the campaign changes schedule.
A good schedule leaves room for change. Effective content calendar tracking and adjustment means locking in a draft first, then reviewing resources and deadlines before finalizing the complete table.
Common mistakes that break a content calendar and how to avoid them
Content calendar breakdowns usually come from scheduling too much, not tying content to goals, copying schedules across channels, lacking buffer time, not reviewing after publishing, and not having a clear owner. To keep the schedule running smoothly, check each point against operational signs, then adjust based on actual available resources.

Scheduling too much without enough resources
A weekly or monthly social media posting schedule usually breaks because the number of posts exceeds what the team can write, design, and approve in the same rhythm. The signs are obvious: posts are delayed by 1–2 days, captions are shortened, visuals are inconsistent, or the team has to rush at the end of the week. The fix is to reduce the volume to a pace you can sustain, lock in the minimum number of posts needed to keep momentum, and only expand once the team has buffer time. For example, a 12-post monthly schedule with only 1 writer is often more likely to fall behind than an 8-post monthly schedule that runs steadily.
- Recount the team’s real capacity in one week. If you can only write 3 posts, design 2 visuals, and approve 4 posts, don’t schedule 6–8 posts at once.
- Lock in the minimum first, then add extra posts. For example, keep 2 main posts per week and 1 backup post if time allows.
- Watch for overload after 2 weeks. If every post is late, cut 20–30% of the volume before increasing again.
No review and adjustment after publishing
How to schedule content with a content calendar effectively means treating the content schedule as a working draft, not a fixed table. Without review, you’ll repeat weak topics, ignore channels that perform well, and fail to scale formats that are showing promise. The minimum checklist should include: which posts performed well, which topics generated the most comments, which channels drove traffic or inbox messages, and which posts need a different angle.
- Set a fixed weekly or monthly review. Use Google Sheets or Notion to record published posts, publish dates, and results.
- Compare 3 key metrics for each post: reach, engagement, and clicks or inbox messages. For example, a short how-to post with 2,000 reach and 35 comments is often worth keeping more than a 5,000-reach post with no response.
- Adjust the schedule for the next cycle right after the review. Keep effective formats, drop weak ones, and change topics if 2–3 consecutive posts miss the goal.
- Assign one person to confirm changes. If no one signs off, the new schedule can easily fall back into the old mistakes.
How to keep a content calendar consistent without turning it into posting pressure
How to schedule content with a content calendar only lasts when there is buffer time, a way to repurpose topics, and a fixed weekly review rhythm. For solo creators or small teams, the goal is not to post more often, but to keep the schedule steady, the content usable, and avoid last-minute posting.

How to create content buffer so you don’t miss deadlines
A content buffer is a set of backup posts completed before their publish date, and you should usually keep at least 20–30% of the editorial calendar in a ready state. This helps prevent schedule breakdowns when a post takes longer to approve, a campaign changes suddenly, or the owner becomes unexpectedly busy.
- Separate out posts that are likely to be delayed: posts needing approval, posts with multiple revision rounds, and promotional posts.
- Prioritize creating the 3–5 “core” posts in the 30-day content plan for the fanpage first.
- Leave 1–2 slots open each week for flexible content instead of locking the entire weekly, monthly, or quarterly social media posting schedule.
- For a content calendar template for Facebook and TikTok, the buffer should sit in two groups: evergreen posts and posts that can be quickly reframed.
If the team is small, a simple status board is enough: written, pending approval, ready to publish. When one post gets delayed, you move a buffer post up instead of rewriting the whole schedule.
How to review the schedule weekly to keep a realistic rhythm
A 20–30 minute weekly review is enough to keep how to schedule content with a content calendar aligned with reality. The goal is to confirm which posts are done, which need a topic change, and which channel should be prioritized next week.
Short checklist:
- Which posts are complete, and which are still waiting for feedback.
- Which posts are delayed because of missing data, missing visuals, or missing approval.
- Which topics are repeating and could be replaced with another post in the same idea group.
- Which channel needs to keep momentum first: Facebook, TikTok, or the blog.
If a post isn’t ready, switch to a backup post instead of forcing a rigid schedule. With effective content calendar tracking and adjustment, a good schedule is one that still runs when delays happen, not one that only looks good in a file.
Frequently asked questions about how to schedule content with a content calendar
Should you plan content weekly or monthly?
A weekly schedule works well when you’re still testing topics, the team has only 1–2 people, or you need quick customer feedback. A monthly schedule works better when content approval has multiple layers, or when you already have a stable set of topics for the blog, fanpage, and email.

- Choose a weekly schedule if you need a clear view of the next 7 days.
- Choose a monthly schedule if you need to lock in topics, owners, and publish dates early.
- Review again after 2 weeks or 1 month based on how many posts were published on time.
For example, a cosmetics shop with only 1 content writer and 1 approver often uses a weekly schedule to avoid piling up posts. When the team grows to 3–4 people, they switch to a monthly schedule to coordinate visuals, captions, and landing pages earlier.
What template should beginners start with to avoid confusion?
Beginners should start with a content calendar in Google Sheets with 5 columns: publish date, channel, topic, status, and owner. This is simple enough to track 1–2 channels without becoming overwhelming.
- Create a new Google Sheets file.
- Add 5 basic columns to manage each post.
- Only choose the first 1–2 channels, such as the fanpage and blog.
- Use one color for each status: not written, in review, published.
For example, a freelancer writing for a fanpage and blog can plan 8 posts per month, with 4 posts for the fanpage and 4 for the blog. Once the process is more stable, you can add TikTok or email.
How do you avoid running out of ideas after a few weeks?
A content schedule won’t run out of ideas if you maintain a backlog and repurpose posts effectively by topic. Gather customer questions, save high-bookmark posts, and turn one big topic into 3–5 smaller posts.
- Each week, save at least 5 ideas from customer questions, comments, and inbox messages.
- Each month, review the top-performing posts on Facebook, TikTok, or the blog.
- Choose 1 strong topic and split it into a post series, for example: problem, how to do it, common mistakes.
- Update old posts when new data appears or the product changes.
For example, a post on “how to schedule content with a content calendar” can be split into 4 posts: a table template, how to choose frequency, how to track KPIs, and how to handle delays. This keeps the schedule from going empty after 2–3 weeks.
For official and up-to-date guidance, you can also refer to resources from HubSpot Blog.
You can also explore more practical marketing guides at https://marketing365.vn.
Content from marketing365 is built for SMEs, online shop owners, and new marketers.
You can also read more articles on the same topic in the Content Marketing category.