
Contents
- Prepare before shooting: don’t press the shutter when the product, background, and light are still messy
- Lighting determines 70% of the photo’s feel: use simple light sources before thinking about equipment
- Composition and shooting angles: how to make the product stand out without cluttering the frame
- How to shoot with a phone so the photos are sharp, stable, and true to color
- Editing product photos on a phone: do just enough to keep them clean, not “fake”
- Common mistakes that make product photos look unprofessional even when you’re using a phone
- A quick workflow for Shopee and TikTok Shop sellers who need photos fast
- Frequently asked questions about product photography with a phone
Product photos taken with a phone can produce clear, clean, and convincing images if you control the lighting, background, and shooting angle properly. Many shops end up with dark photos, off-color tones, shaky shots, or cluttered backgrounds, which means more time spent editing and slower product listings.
This section focuses on practical at-home methods for shop owners and e-commerce teams: preparing the scene, setting up the shoot, choosing product angles, and doing basic product photo editing on a phone. If you want to take beautiful product photos with a phone yourself, start with a simple, repeatable process that fits the real products you sell.
Prepare before shooting: don’t press the shutter when the product, background, and light are still messy
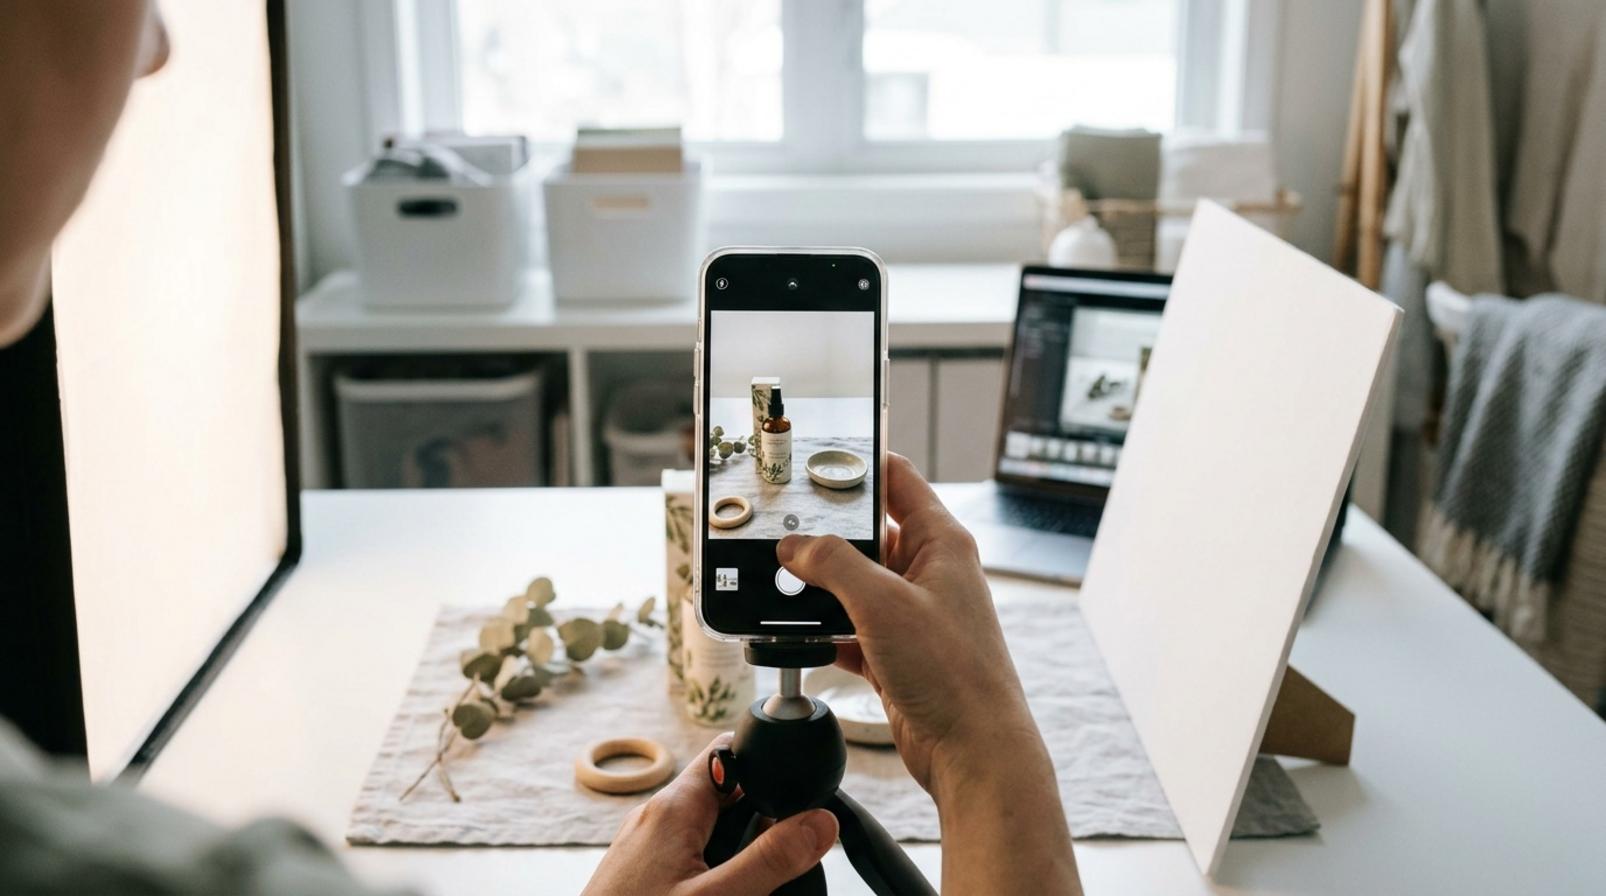
Proper preparation before shooting helps product photos look cleaner, sharper, and easier to sell from the very first frame. With product photography on a phone, the first thing to check is not the device, but whether the product, surface, background, and available light are already tidy.
Choose the right photo style for the product and sales channel
Each product category needs a different type of photo because the display purpose is different too. Items that need clear detail, such as cosmetics, small accessories, or household goods, often work well on a white background; fashion, bags, and shoes sell better with lifestyle photos; while fabric, leather, and metal materials should also have close-up texture shots so viewers can see the surface clearly.

If the product could be misunderstood in terms of size, add a photo with a comparison object or place it next to a person’s hand. When shooting product photos with a phone, don’t force one product-photo layout across every sales channel. Photos for marketplaces need to be clear, compact, and easy to read in thumbnails; photos for social media can be more open, but the main subject still has to stand out.
Clear the product, background, and props before setting up the camera
A tidy product-shoot setup will save a lot of time when editing product photos on a phone later. Before shooting, wipe dust off the product, iron fabric flat if needed, remove unnecessary labels, and clear reflective objects or mismatched items out of the frame.
The surface should be clean, not too scratched, and not visually clashing with the product-photo background. If you’re shooting at home, a few basic items such as white paper, clips, and a soft cloth are enough to adjust the product angle and keep the composition stable. Once everything is neat, lighting is easier to control, the image looks less cluttered, and product photography is less likely to be shaky because you have to reframe too many times.
Lighting determines 70% of the photo’s feel: use simple light sources before thinking about equipment
Lighting determines most of the feel of a product photo because it affects brightness, color, and depth. When shooting at home, prioritize simple light sources like a window first, then add supplemental lighting if needed.
Recognize good light and light to avoid
Good light makes the product’s material visible, avoids blown highlights, and does not cast harsh shadows across the surface. One professional phone product-photography tip is to place the item near a window and rotate it slightly 15–30 degrees to see whether the shadow edges are soft and even.
If the product color turns yellow, the logo glares, or the plastic surface reflects as a white patch, the light is too harsh. If a white tabletop still looks gray in the photo, the light is usually color-shifted or uneven. With product photography on a phone, simply changing the shooting position by one or two steps can make a huge difference.
Quick checklist:
- Shadows are soft and do not cut across the product.
- White still looks white, without a strong blue or yellow cast.
- Logo details, fabric, and surface texture remain visible.
How to handle it when you can only shoot in a dim space
When the room is too dark, add a safe secondary light source instead of pushing the camera settings too far. A desk lamp shining through a thin curtain, tracing paper, or a diffuser sheet is enough to soften product-photo lighting and reduce harsh shadows.
If you only have a phone, increase brightness by slightly raising the exposure slider and keep the device steady so the product photo doesn’t shake. Place white paper or foam board on the side opposite the light source to bounce light into darker areas. Don’t zoom in digitally and crop heavily, because the image can quickly become soft and lose detail.

Recommended sequence:
- Choose the spot closest to the light source that still leaves enough room for the background.
- Turn on the secondary light at a low level first, then increase gradually.
- Take a test shot and check the shadows and product color.
- Adjust brightness only as much as needed; do not force the image to be overly bright.
Composition and shooting angles: how to make the product stand out without cluttering the frame
Effective product-photo composition means viewers immediately see the main item, notice the important details, and are not distracted by the background. With product photography on a phone, you only need to choose the right angle, leave enough breathing room, and avoid placing too many supporting objects in the same frame.
Choose the shooting angle by product category
The right angle helps the product show its shape, material, and selling details from the very first image. For shirts, pants, and scarves, shoot straight on or slightly from above to show the surface and stitching. For gift boxes, cosmetics, and depth-oriented products, a 15–30 degree angle often helps show both the front face and thickness. For bottles, plastic items, or reflective metal products, rotate the item about 20 degrees away from the light source to reduce glare on the surface.
A quick method is to take three consecutive angles for each product. Angle 1 is straight on for the main image on Shopee or TikTok Shop. Angle 2 is a slight diagonal for depth. Angle 3 is a close-up of details such as the logo, zipper, box lid, or trim. For example, when shooting a 50ml perfume bottle, the main image should keep the label centered in the frame. The secondary image should move the camera slightly lower to show the bottle shape more clearly.
Keep the frame clean so the product remains the main focus
A clean frame is one that keeps only the details that help buyers understand the product faster. When setting up product shots at home, let the product occupy about 60–70% of the visible area and leave just enough space around it. That empty space makes the photo feel airy while still keeping the viewer’s eye on the main item.
Read more: How to Decorate a Shopee Storefront to Attract Customers
Props should only be used when they explain the product’s use. For example, when shooting a cup, you can add a table, a cloth backdrop, or a few coffee beans. For a gift box, add tissue paper or a ribbon. If the product already has strong colors, the background should be simple, such as white, gray, or light wood, to avoid competing for attention. Busy patterned backgrounds quickly pull the eye away from the product.
Before pressing the shutter, check all four edges of the frame. Make sure you are not cutting off a handle, box lid, label, or corner. If the photo still feels cluttered, remove one supporting item and shoot again right away. When taking beautiful product photos with a phone, removing one unnecessary detail often makes the composition clearer in just one retake.
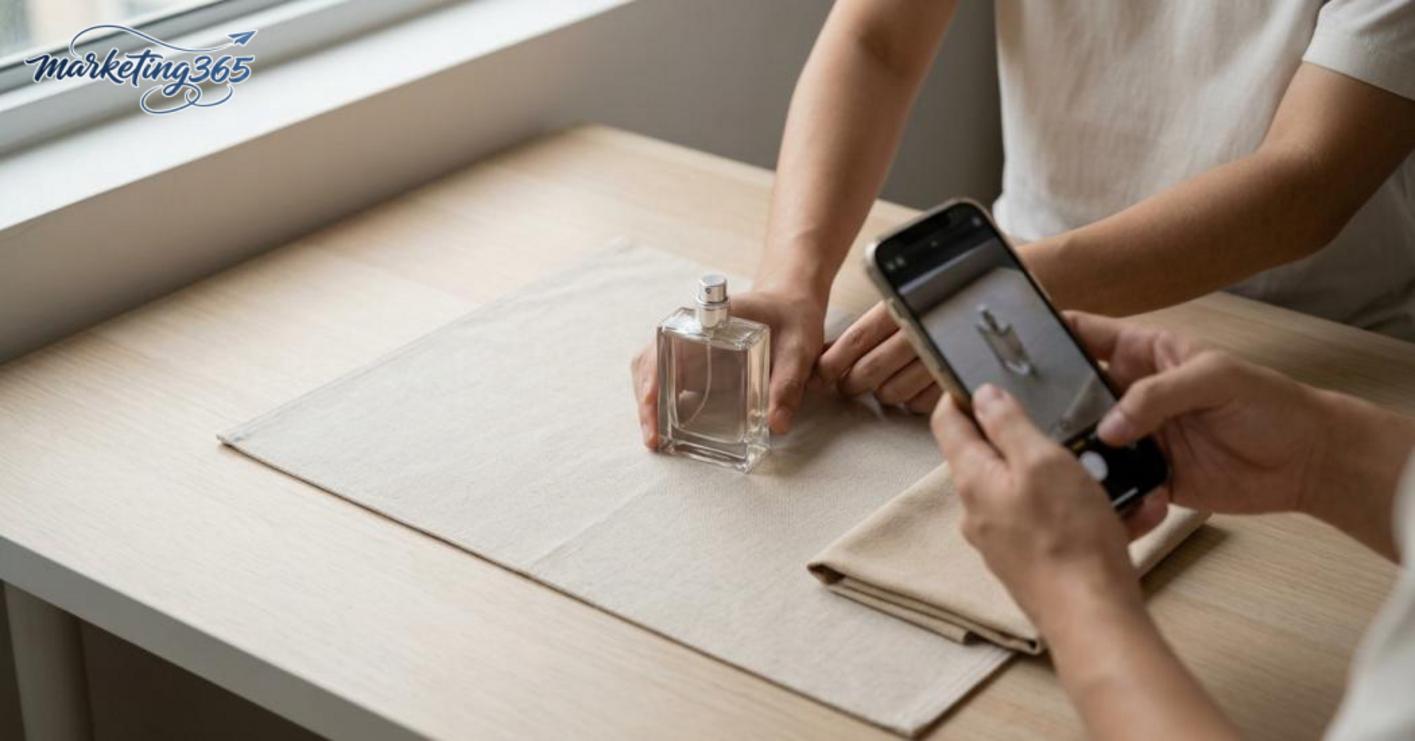
A 3-step process for cleaner, more sellable photos
- Place the product in the center of the frame, then move the camera back to leave a safe margin on all four sides.
- Take one straight-on shot, one slight diagonal shot, and one close-up of an important detail.
- Review each photo on your phone screen, remove unnecessary props, and retake if the main detail is blocked or cropped.
This method works well for sellers who need clear photos on a phone, especially when posting quickly to marketplaces or creating feed images. If the frame starts to feel cluttered, return to the simple rule: keep only the product, one supporting prop if needed, and one main focal point in each photo.
How to shoot with a phone so the photos are sharp, stable, and true to color
To make product photos sharp, stable, and true to color on a phone, follow the right order: clean the lens, hold the device steady, tap to focus, check the exposure, then shoot in batches. Skip even one small step and the photo can easily become blurry, overexposed, or color-shifted, especially when shooting on a desk with mixed ceiling light and window light.
How to tap focus and adjust exposure on the phone screen
Tapping the most important part of the product is the fastest way to make the key selling point sharp. For bottles, tap the label; for small accessories, tap the main detail; for clothing, tap the fabric surface. Then immediately check the brightness slider on the screen: if the white areas are blown out, lower it slightly; if the product is too dark, raise it in small steps.
When taking beautiful product photos with a phone, don’t rely on instinct and assume one shot is enough. Take 1–2 test shots, zoom in to check the text edges, object edges, and shadow areas to make sure they are still clean. If the background color turns yellow because of room lighting, change position or reduce artificial light before shooting again.

Tips to reduce hand shake when pressing the shutter
Shake-free product photography starts with your stance and how you hold the phone. Rest your elbows on the edge of the table, hold the device firmly with both hands, and press the shutter with one hand or use a short timer if the frame is prone to shaking. Don’t step backward while shooting, because even a small movement can soften the image.
One professional phone product-photography tip is to take 3–5 consecutive shots from the same angle. Usually at least one image will stay sharper than the others, especially in close-up shots.
Read more: How to Write Best-Selling Product Descriptions
How to take multiple photos at once so it’s easier to choose the best one
Product photography with a phone works best when you shoot in batches: one angle, multiple shots, then move to the next angle. This makes it easier to compare which image has clearer details, better color, and a cleaner composition instead of expecting one file to fix every mistake.
When changing angles, keep the lighting and distance the same first, and only change the camera position or rotate the product. After each round, review the screen and remove blurry, unevenly lit, or distorted shots early. If you follow this rhythm, you’ll save a lot of time on product photo editing on your phone.
Editing product photos on a phone: do just enough to keep them clean, not “fake”
Editing product photos on a phone should stop at making the image cleaner, brighter, and more color-accurate. The goal is to edit so the product looks as close to real as possible, not to turn it into a different version on screen.

The first edits you should make
Prioritize edits in this order so you don’t get distracted: crop, adjust brightness, correct color, then add a light touch of sharpness. For product photo editing on a phone, the first step is cropping so the product fills the main frame, removing excess edges and keeping the composition cleaner. Then adjust exposure or brightness just enough so details don’t disappear, and correct white balance if the image looks too yellow or too blue.
Next, increase sharpness very slightly so the product edges look clearer, especially when shooting product photos on a phone in indoor light. If you need to keep an entire set consistent, use the same color tone and brightness across all images, especially for a storefront or carousel post. Keep a white background if the product needs a clean, easy-to-compare look; keep a natural background if material, fabric color, or surface texture is the main selling point.
Post-processing mistakes that make sales photos lose credibility
Photos lose credibility mainly when they are edited too heavily, making the product look better but no longer realistic. The most common mistake in product photo editing on a phone is pushing saturation too far, which makes the product color differ from the actual item when customers receive it.
Another mistake is making skin, plastic, fabric, or metal surfaces too smooth; too much detail gets erased and the image starts to look “fake.” Don’t remove all shadows if they help viewers understand the product’s shape and real size. Overblown white backgrounds are also risky because the product edges can disappear or the tone can shift. If a photo set has some overly bright shots, some dark shots, and some color-cast shots that differ too much, adjust them back to one standard before posting so beautiful product photos taken with a phone still remain trustworthy.
Common mistakes that make product photos look unprofessional even when you’re using a phone
Product photos often look unprofessional because of the setup, lighting, angle, and post-processing rather than because the phone is weak. When shooting product photos with a phone, even one small misstep can make the image dark, color-shifted, shaky, or lacking detail.
Read more: How to List Products on Shopee with SEO for Beginners

Photos that are dark, color-shifted, or overexposed
Dark photos, yellow/blue color casts, or blown highlights usually happen because the product-photo lighting is placed in the wrong spot, too close to the light source, or because the phone screen blocks part of the light. A quick fix is to rotate the product 30–45 degrees relative to the window, move it a little farther from the lamp, and test 2–3 angles before deciding. If the background still shifts in color, correct the white balance in the camera or during product photo editing on the phone instead of simply increasing brightness too much.
Quick checklist:
- Place the light source to the side, not directly from above.
- Keep the distance between the product and the light stable.
- Turn off other colored light sources in the room.
- Check the screen before shooting to avoid shadows blocking the light.
Photos that are shaky, blurry, or lacking detail
Shaky, blurry, or out-of-focus photos usually come from hand movement, shooting in a dark room, focusing on the wrong area, or overusing digital zoom. To keep product photos from shaking, hold the phone with both hands, tap to focus on the area that needs to be sharp, and stay still for 1–2 seconds before pressing the shutter. Wiping the lens with a soft cloth before each shoot is also recommended, because even a thin layer of dust can noticeably reduce sharpness.
Quick fixes:
- Increase ambient light instead of zooming in.
- Minimize cropping after the shot.
- Use zoom only when truly necessary; move closer to the product instead.
- Take one test shot, zoom to 100%, and check the edges, text, and surface detail.
If the photo is still blurry even after adjusting your technique, the problem is usually the setup and handling, not the phone itself.
A quick workflow for Shopee and TikTok Shop sellers who need photos fast
This is a fast-shoot workflow for Shopee and TikTok Shop sellers to produce a usable photo set in one session. Product photography with a phone works best when time is short if you keep the setup simple, shoot enough angles, and then make light edits so the images stay consistent and the product remains clear.
30-minute quick-shoot checklist
- Clear the product, wipe off dust, and choose a solid-color product-photo background. The goal is to avoid visual clutter and keep the product prominent.
- Place the phone near a window or a diffused light source, then lock exposure if the phone supports it. When light comes from one side, photos are more likely to shift in color and lose detail.
- Take 2–3 test shots from the straight-on angle, a 45-degree angle, and a close-up detail shot. This is the fastest at-home product-shoot setup to check product-photo composition before shooting in batches.
- Take 5–10 consecutive shots at each angle to avoid shake, especially when holding the phone by hand. For small products, keep the phone fixed and use a 2-second timer.
- Choose the sharpest and bright-enough shot, then edit the product photo on your phone in three steps: slightly increase brightness, correct white balance, and straighten the crop.
- Match the color and crop across the entire set so the storefront doesn’t look inconsistent between the cover image and detail shots.
When to stop DIY shooting and upgrade the setup
If the product reflects too strongly, colors shift between shots, or you need a large number of images for a campaign, it’s time to stop at phone-based product photography and upgrade the setup. A better product-shoot setup will help keep colors stable, reduce editing time, and limit faulty images when posting in bulk.

Signs that you should upgrade include: repeated blown highlights on glossy surfaces, catalog photos that need consistency across many SKUs, or ad visuals that require a very high level of accuracy. At that point, professional phone product-photography tips are enough for testing, but not for long-term operations.
Frequently asked questions about product photography with a phone
Product photography with a phone is enough to sell on Shopee and TikTok Shop if the photos are clear, properly lit, and shot from the right product angle. For many new shop owners, a phone is also easier to control than a camera when they need to shoot quickly and keep the visual style consistent.
- If the photo is dark, prioritize product-photo lighting from a window or soft side lighting.
- If the photo has a color cast, correct white balance before increasing sharpness.
- If you shoot multiple models, keep a consistent product-photo composition so the storefront looks neat.
Whether you should use a white background or a contextual background depends on the photo’s purpose. White backgrounds work well for main images, category images, and when you need the product to stand out clearly; contextual backgrounds are better for showing function, such as cosmetics on a vanity table or household items in a kitchen. Beautiful product photography with a phone is often most effective when the set includes both styles.
How do you keep photos from shaking and blurring? Place the phone on a tripod, use a 2-second timer, or enable the volume button as the shutter if the device supports it. When you don’t have a tripod, rest the phone on a sturdy box, clean the lens, and shoot several frames before choosing the sharpest one. A common mistake is holding the phone too close, which makes product edges soft and hard to use as a cover image.
Do you need to edit a lot after shooting? Only edit as much as needed: crop, slightly increase brightness, correct perspective distortion, and keep colors consistent across images. Overediting makes the product look unrealistic and can cause color mismatches with the item delivered to customers. With at-home product-shoot setup methods, the cleanest workflow is to shoot correctly first, then edit product photos on the phone in three steps.
MARKETING365
📧 Email: lienhe@marketing365.vn
🌐 Website: https://marketing365.vn
👍 Fanpage: https://facebook.com/marketing365.official
For the latest official guidance, you can also refer to materials from Think with Google.
Related articles
- What is AOV? Average order value
- What is a landing page? A high-converting destination page
- How to Run Shopee Ads for Beginners
You can read more articles on the same topic in the Ecommerce Marketing category.